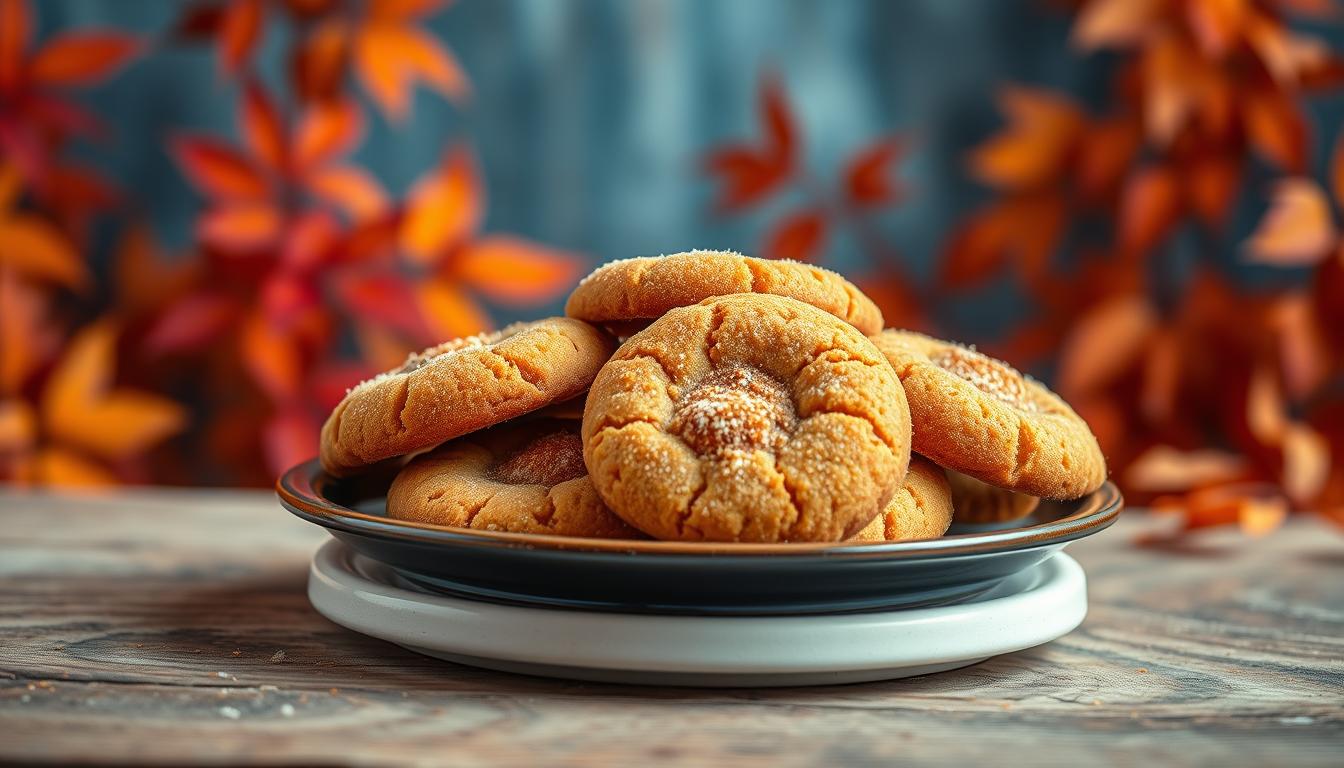
How to Make Chewy Chocolate Chip Cookies Perfectly Soft
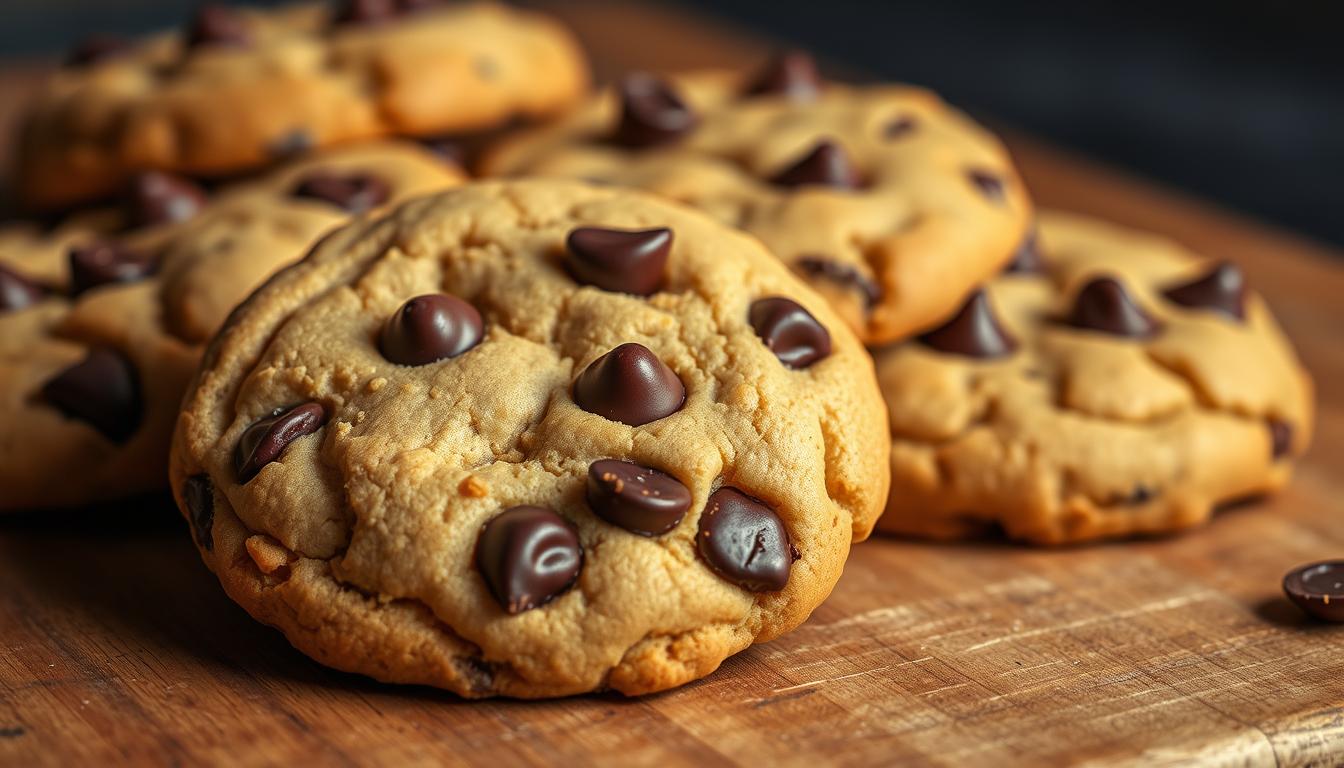
There’s something magical about the smell of freshly baked treats filling your kitchen. It’s a moment of warmth, comfort, and pure joy. If you’ve ever dreamed of creating bakery-style chocolate chip cookies that are soft, chewy, and utterly irresistible, you’re in the right place.
This recipe, with over 21 million page views, has been tested and loved by countless bakers. The secret lies in the perfect balance of ingredients. Melted butter and an extra egg yolk create a rich, tender texture, while a higher ratio of brown sugar to white sugar ensures that delightful chewiness.
But it’s not just about the ingredients—it’s how you use them. Chilling the dough and baking at the right temperature are crucial steps. Follow these precise instructions, and you’ll achieve chewy chocolate chip cookies that are soft, golden, and absolutely perfect every time.
Key Takeaways
- Use melted butter and an extra egg yolk for a rich, tender texture.
- Increase the ratio of brown sugar to white sugar for chewiness.
- Chill the dough before baking to enhance flavor and texture.
- Bake at the right temperature for perfectly golden edges.
- Follow precise instructions for consistent, bakery-style results.
Introduction to the Perfect Cookie Experience
The aroma of freshly baked treats can instantly transport you to a place of comfort and joy. This recipe, loved by millions, has become a go-to for bakers everywhere. With over 21 million views since 2013, it’s clear that this isn’t just another cookie recipe—it’s a tried-and-true favorite.
Adrienne, one of the many fans of this recipe, shared her experience:
“These are the best cookies I’ve ever made! The soft center and crisp edges are perfection.”
Her words echo the sentiments of countless others who’ve tried and fallen in love with this method.
What makes this recipe stand out? It’s the careful balance of ingredients and techniques. From the way you mix the dough to the temperature of your baking sheet, every detail matters. Follow the steps, and you’ll achieve a treat that’s soft in the middle with just the right amount of crispiness on the edges.
This isn’t just a recipe—it’s an experience. Whether you’re a seasoned baker or a beginner, this guide will walk you through every step. Get ready to create something truly special that will have everyone asking for more.
Ingredients and Essential Tools
Creating the perfect batch of cookies starts with the right ingredients and tools. Every detail, from the type of butter you use to the equipment in your kitchen, plays a crucial role in achieving that soft, flavorful texture. Let’s dive into what you’ll need to make your baking experience a success.
Key Ingredients for Rich Flavor and Chewiness
The foundation of any great recipe lies in its ingredients. For cookies that are soft and chewy, you’ll need:
- Melted butter: Adds richness and helps create a tender texture.
- Brown sugar: Provides moisture and chewiness, while white sugar adds crispness.
- Eggs: An extra egg yolk enhances richness and chewiness.
- Cornstarch: Keeps the cookies soft and prevents them from spreading too much.
Remember to use room temperature eggs and measure your flour by spooning it into the cup and leveling it off. Precision is key to replicating this chef-tested recipe.
Must-Have Baking Equipment for Success
Having the right tools can make all the difference in your baking process. Here’s what you’ll need:
| Tool | Purpose |
|---|---|
| Baking Sheets | Ensures even baking and prevents burning. |
| Parchment Paper | Keeps cookies from sticking and makes cleanup easier. |
| Cookie Scoop | Creates uniform cookies for consistent baking. |
| Cooling Rack | Allows cookies to cool evenly without becoming soggy. |
With these ingredients and tools, you’re well on your way to creating cookies that are soft, chewy, and absolutely delicious. Follow the measurements and steps carefully, and you’ll achieve bakery-quality results every time.
The Science Behind Soft and Chewy Textures
Understanding the science behind baking can transform your results from good to great. Every ingredient in your recipe plays a specific role in creating the perfect texture. From the way melted butter interacts with dry ingredients to how brown sugar retains moisture, the chemistry of baking is fascinating.
Role of Melted Butter, Brown Sugar, and Cornstarch
Melted butter creates an emulsion with dry ingredients, giving your baked goods a tender crumb. Unlike softened butter, melted butter spreads more evenly, ensuring a consistent texture. Brown sugar, with its molasses content, adds moisture and chewiness. This is why a higher ratio of brown sugar to white sugar is key for softness.
Cornstarch acts as a thickening agent, preventing excessive spreading. It also helps retain moisture, keeping the center soft while the edges crisp up. Together, these ingredients create a balanced structure that’s both soft and chewy.
How an Extra Egg Yolk Enhances Chewiness
Adding an extra egg yolk to your dough intensifies the richness and chewiness. Egg yolks contain fats and proteins that bind the dough, creating a dense, moist center. This is why recipes with extra yolks often have a more luxurious texture.
Precision is crucial when measuring flour. Too much flour can make your baked goods dry and crumbly, while too little can cause excessive spreading. Always spoon and level your flour for accuracy.
Finally, baking at the right oven temperature and cooling on a sheet are essential. A precise temperature ensures even baking, while cooling allows the texture to set properly. Add a pinch of salt to balance the sweetness and enhance the overall flavor.
Step-by-Step Recipe Instructions
Mastering the art of baking starts with precise steps and techniques. Follow these detailed instructions to create cookies with the perfect texture and flavor. Each step is designed to ensure consistency and quality in every batch.
Mixing the Dough the Right Way
Begin by combining melted butter with brown and white sugar. Mix until the sugars are fully dissolved. This step is crucial for achieving the right texture. Add eggs one at a time, followed by a splash of vanilla extract. The vanilla enhances the flavor profile, making each bite more enjoyable.
In a separate bowl, whisk together flour, baking soda, and a pinch of salt. Gradually add the dry ingredients to the wet mixture. Mix until just combined—overmixing can lead to a dense texture. Use a spatula to fold in your favorite add-ins, ensuring even distribution.

Chilling and Shaping Techniques
Chilling the dough is a critical step. Cover the bowl with plastic wrap and refrigerate for at least 2-3 hours. This allows the flavors to meld and the dough to firm up, making it easier to shape. Skipping this step can result in cookies that spread too much during baking.
When shaping the dough, aim for tall, textured columns rather than wide, flat discs. This technique helps create a bakery-style appearance. Use a cookie scoop for uniform sizes, ensuring even baking. Place the dough balls on a parchment-lined baking sheet, leaving enough space between them.
| Step | Key Details |
|---|---|
| Mixing | Combine melted butter and sugars thoroughly. Add eggs and vanilla. |
| Chilling | Refrigerate dough for 2-3 hours to enhance flavor and texture. |
| Shaping | Form tall dough balls for a bakery-style look. |
| Baking | Bake at 350°F for 10-12 minutes, depending on your oven. |
Timing is everything in baking. Preheat your oven to 350°F and bake the cookies for 10-12 minutes. Keep an eye on them to avoid overbaking. Once done, let them cool on the baking sheet for 5 minutes before transferring to a wire rack. This ensures the perfect balance of crispy edges and a soft center.
Secrets to Baking Chewy Chocolate Chip Cookies
Perfecting the art of baking requires attention to detail and a few expert tricks. Achieving the ideal balance of crispy edges and soft centers is a skill that can elevate your baked goods to the next level. Let’s dive into the nuances that make all the difference.
Achieving Crispy Edges and Soft Centers
The key to creating a perfect contrast lies in the way you handle the dough and monitor the baking process. Start by ensuring your ingredient ratios are precise. Too much flour can make your baked goods dry, while too little can cause excessive spreading.
When shaping the dough, aim for tall, textured columns rather than flat discs. This technique helps create a bakery-style appearance. Use a cookie scoop for uniform sizes, ensuring even baking. Place the dough balls on a parchment-lined baking sheet, leaving enough space between them.
During baking, keep an eye on the edges. They should turn golden brown while the centers remain slightly underbaked. This ensures a soft, chewy interior that continues to set as the cookies cool.
Baking Time and Temperature Nuances
Understanding the interaction between soda and oven temperature is crucial. Baking soda helps the cookies rise and spread, but the oven temperature controls how quickly this happens. Preheat your oven to 350°F for consistent results.
Here are some expert tips to keep in mind:
- Deflate the cookies by gently tapping the baking sheet halfway through baking. This creates a delicate texture.
- Adjust the baking time based on cookie size and dough consistency. Larger cookies may need a few extra minutes.
- Maintain a consistent kitchen environment. Avoid opening the oven door frequently, as this can cause temperature fluctuations.
By following these steps, you’ll achieve bakery-quality results every time. The contrast between crispy, golden edges and a soft, chewy center will make your baked goods irresistible.
Tips, Tricks, and Creative Variations
Unlock the full potential of your baked goods with these expert tips and tricks. Whether you’re looking to store your creations for later or experiment with new flavors, these insights will help you achieve consistent, delicious results every time.
Freezing, Storage, and Reheating Tips
Freezing your cookie dough is a game-changer for busy bakers. Shape the dough into dough balls, place them on a baking sheet, and freeze until solid. Transfer the frozen balls to a zip-top bag for long-term storage. This method ensures you can bake fresh treats anytime.
For storing baked goods, use an airtight container with a slice of bread. The bread helps retain moisture, keeping your baked goods soft for days. If they start to dry out, a quick reheat in the oven at 300°F for 5 minutes will restore their original texture.

Mix-In Variations to Elevate Your Baked Goods
Experimenting with mix-ins can add a fun twist to your recipes. Try adding chopped nuts, candy bits, or different types of chocolate for unique flavors. Here’s a table of creative ideas to inspire your next batch:
| Mix-In | Flavor Profile |
|---|---|
| Dark Chocolate Chunks | Rich and slightly bitter |
| White Chocolate and Macadamia Nuts | Creamy and nutty |
| M&Ms | Sweet and colorful |
| Dried Cranberries and Walnuts | Tangy and earthy |
Subtle tweaks, like adjusting the amount of melted butter, can also impact texture and flavor. Stick to the core recipe method for consistency, but don’t be afraid to get creative with your add-ins.
Common Pitfalls and Troubleshooting Advice
Even the most experienced bakers can run into issues when perfecting their recipes. Small mistakes, like overmixing or misreading oven temperatures, can turn your treats into disappointments. Here’s how to avoid these common pitfalls and achieve the perfect texture every time.
Avoiding Overmixing and Flour Measurement Errors
Overmixing your dough can lead to a heavy, cakey texture. Mix until just combined to keep your baked goods light and tender. Make sure to use the spoon-and-level method for measuring flour. Too much flour can dry out your dough, while too little can cause excessive spreading.
Accurate measurements are key. Use a kitchen scale if possible, or spoon flour into your measuring cup and level it off with a knife. This ensures consistency and prevents common baking mishaps.
Adjusting for Oven Temperature and Dough Consistency
Oven temperature plays a critical role in baking. Make sure your oven is properly calibrated. An oven thermometer can help you verify the accuracy of your settings. Uneven heat can lead to inconsistent results, so always preheat your oven before baking.
Handling soft dough can be tricky. Work on parchment paper to prevent sticking and make shaping easier. If your dough is too sticky, chill it for 15-20 minutes before shaping it into balls. This helps maintain structure during baking.
| Issue | Solution |
|---|---|
| Overmixing | Mix until just combined to avoid a dense texture. |
| Flour Measurement | Use the spoon-and-level method for accuracy. |
| Oven Temperature | Calibrate your oven and use a thermometer. |
| Soft Dough | Chill dough and use parchment paper for shaping. |
By following these tips, you can troubleshoot common issues and achieve bakery-quality results. Remember, precision and patience are your best tools in the kitchen.
Conclusion
Baking the perfect batch of cookies is both an art and a science. This guide has walked you through every step, from measuring purpose flour to using a mixer for consistent results. Each tablespoon of ingredients and every teaspoon of technique plays a vital role in achieving that soft, flavorful texture.
Remember to chill your dough and use a scoop for uniform shapes. Combining dry ingredients with precision ensures your baked goods turn out just right. If you encounter issues, revisit the troubleshooting tips and creative variations for inspiration.
Now it’s your turn to try this recipe. Follow the steps, and you’ll create treats that are soft, golden, and utterly irresistible. Share your results and enjoy the joy of baking!